TL;DR
- There are many mods that change the HUD in Kingdom Come: Deliverance (KCD), but none achieved the level of immersion I was looking for.
- I took inspiration from existing mods to create a clean and minimal HUD/UI mod tailored to my taste.
- The same tools and knowledge can be applied to mod other games like Skyrim and Fallout.
- It’s not that hard — and totally worth it.
Prerequisites
Tools I used:
Mods I used for inspiration:
And of course, I’ll be referencing my own mod: Clean and Minimal HUD and Map.
Basics
A mod is usually a ZIP archive containing files that override parts of the game. Let’s unpack (see what I did there) that by examining the mod I created. The downloadable ZIP file contains two files:
Clean and Minimal HUD\mod.manifestClean and Minimal HUD\Data\CleanAndMinimalHUD.pak
To install, you simply unpack it into the Mods folder in your KCD installation directory. If you’re using Vortex, it handles that for you (plus some extras).
The manifest file contains metadata — mod name, author, etc. Sometimes it’s optional.
The interesting part is CleanAndMinimalHUD.pak, which is itself an archive. Rename it to CleanAndMinimalHUD.zip to inspect its contents. Inside, you’ll find 97 files under Libs\UI\Textures. One of them is Libs\UI\Textures\Hud_main.dds, which contains most HUD UI elements.
By opening it in paint.net, you can see and edit those elements. Here’s an example of how I modified it — resizing, adjusting transparency, recoloring, and trimming:
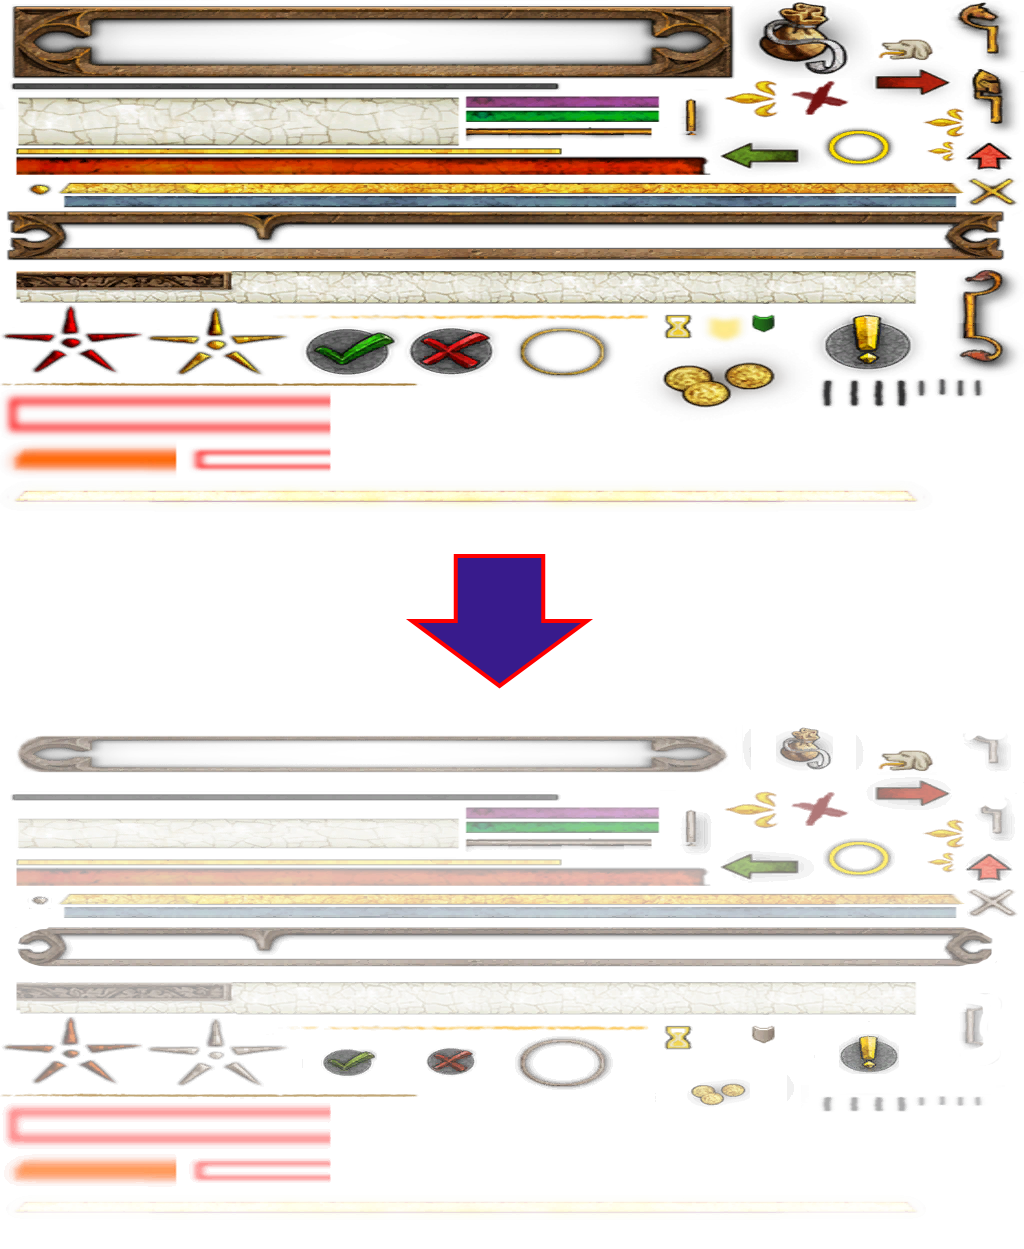
That’s it! Just modify the texture, save it back into the archive in the correct folder structure, and rename it to .pak. Now it’s a mod.
Note: Save the .dds texture using the “BC3 (Linear, DXT5)” setting to ensure compatibility with the game.
Advanced
About 95% of the time, there’s already a mod that does something close to what you want. For the remaining 5%, you’ll need to modify the original game files.
In KCD, navigate to the game’s Data folder — this is why your mod’s .pak file also lives in a Data folder — and look at the .pak files there. Trial and error (or Googling) will reveal that the main UI assets are in Data\GameData.pak.
Rename and extract it to explore its contents. Inside, you’ll find many textures under Libs\UI\Textures. In my mod, I modified 97 of them. You could modify more — or tweak my edits, for example, to increase opacity.
Finding which texture controls which UI element involves some trial and error. You can also get clues from the Flash files (see Expert section below).
Safe vs. Risky Changes
- Safe: Adjusting color and opacity, resizing an element (while keeping it centered).
- Risky: Moving an element — might misalign with others.
- Generally avoid: Changing image dimensions.
Folder Structure, Load Order, and Conflicts
Your mod should mirror the game’s folder structure. That’s how the game knows which files to override. i.e. mimicking the Libs\UI\Textures folder structure found in GameData.pak.
Load order matters: if multiple mods override the same file, the one loaded last wins.
But if you’re customizing mods yourself, you’re no longer at the mercy of load order. You can merge mods — picking your favorite parts from each to create the experience you want.
Limitations
There are three main limitations when modifying textures:
- The same texture may be reused in multiple places. You may unintentionally affect elements you didn’t intend to. For example, the herb-picking “scroll” UI is reused in some map locations.
- Most in-game text is rendered using fonts, not textures. In this mod, the compass letters (N, NW, etc.) remain fully opaque for that reason.
- You can’t reposition elements on screen via textures alone — their layout is controlled by the game code or
.gfxfiles.
Expert
Let’s go deeper. After extracting GameData.pak, open Libs\UI\hud.gfx using JPEXS Free Flash Decompiler. Yes, Flash — surprising, right?
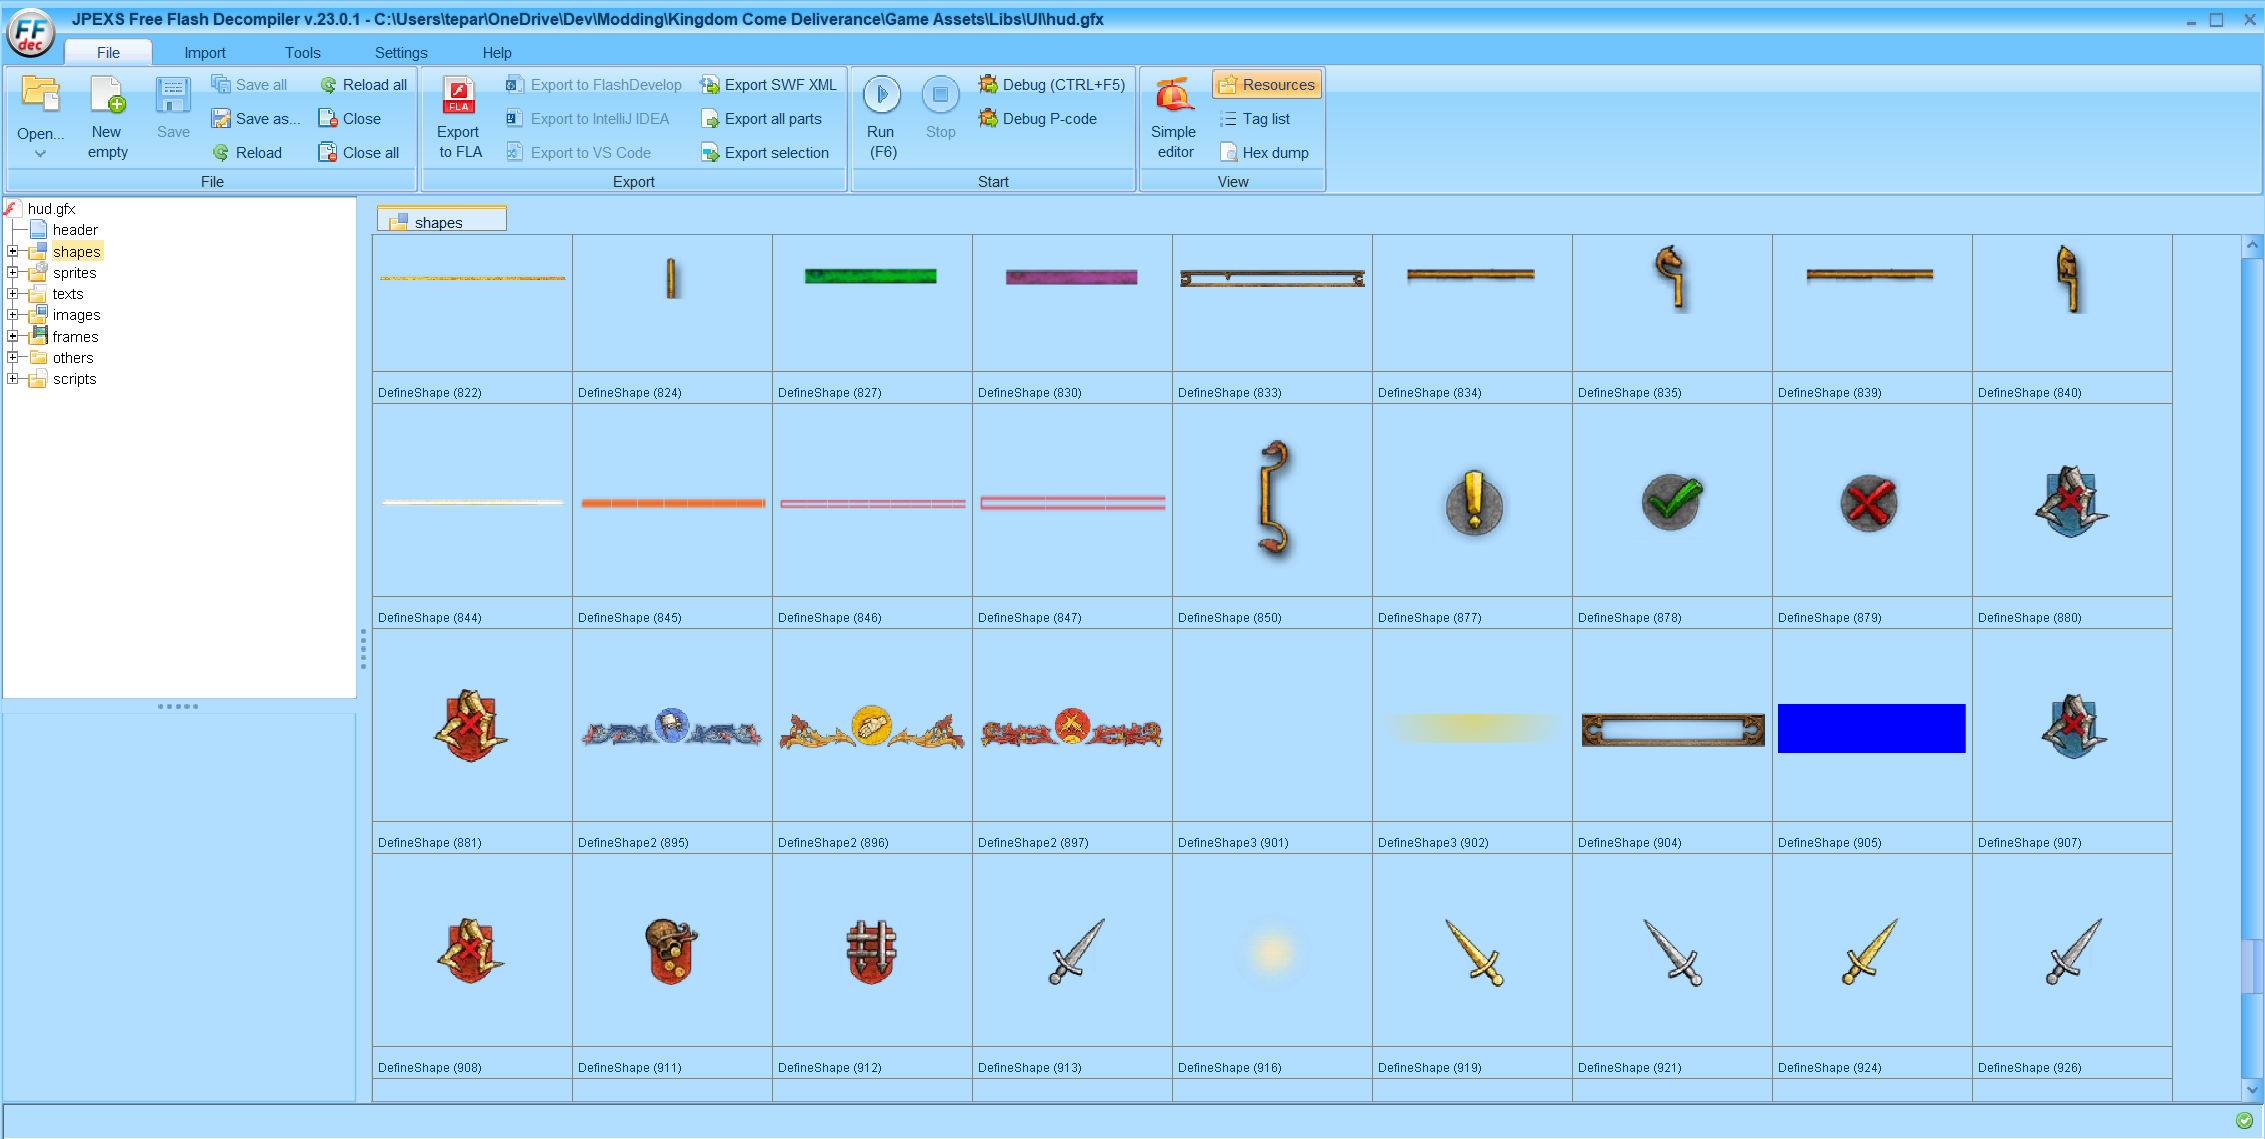
This file contains HUD elements with references to their source textures. Some use entire texture files, while others reference subregions (e.g., a part of Hud_main.dds).
To find the relevant texture for a UI element, follow the breadcrumbs:

Once located, you can modify that texture, include it in your .pak, and the HUD element will update in-game.
.gfx files can also include layout definitions and even some logic. That’s a much deeper rabbit hole, and outside the scope of this post.
paint.net Tips
Arguably the most important tool in your toolkit — and well worth learning to use properly.
Saving .dds
Always save with the “BC3 (Linear, DXT5)” format for compatibility. I don’t know what all the settings mean, but this one has worked for me consistently across games.
Use Layers
paint.net offers excellent support for layers — which is crucial for clean edits. Use layers to:
- Align elements
- Adjust transparency
- Make non-destructive edits
When you’re happy with the changes, merge the layers and save the final image.
Example: using a temporary layer to align resized elements before deleting the original.

Conclusion
Next time a mod gets close to what you want — but not quite — consider tweaking it to your liking.
And if my Clean and Minimal HUD and Map mod falls into that category… we
